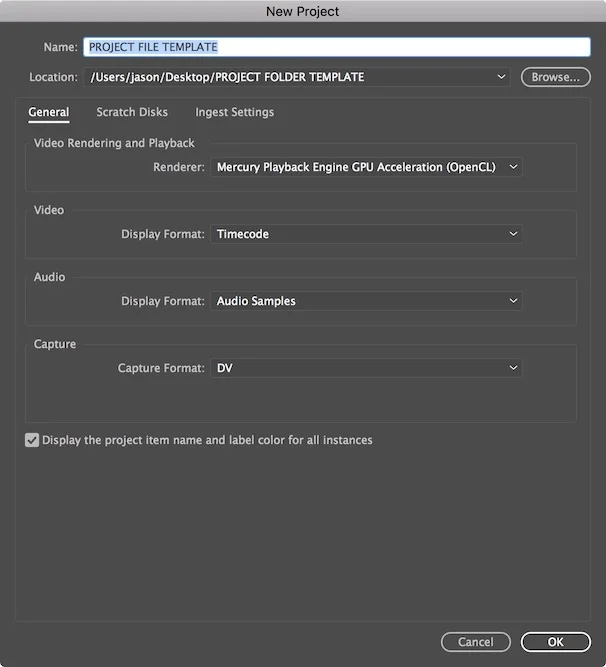
Video editors deal with a lot of files. Beyond the of thousands of media files, render files, autosaves, and backups, the last thing we want to think about is additional… anything. But the dirty secret is, there are probably files on your system right now, devouring precious hard drive space and you have no idea they’re there! ::cue dramatic music:: Welcome to Premiere’s Media Cache!
**Updated: Read to the end for Media Cache updates in the Premiere Pro CC 2017.1 update!
What is it?
First off, what IS the Media Cache? Simply put, Premiere Pro’s Media Cache is a series of helper files that make sure your media and projects run and smoothly as possible. Every time you import a file into a Premiere Pro project, various types of media cache files are created (check out the list further down). The potential trouble here is, that after some time or a big project, the Media Cache can eat up hard drive space - sometimes a lot of it. And so sometimes, it’s beneficial to purge the thing and start over. But let’s not get ahead of ourselves…
First, we see a reference to the Media Cache in Premiere’s Preferences under the Media tab.
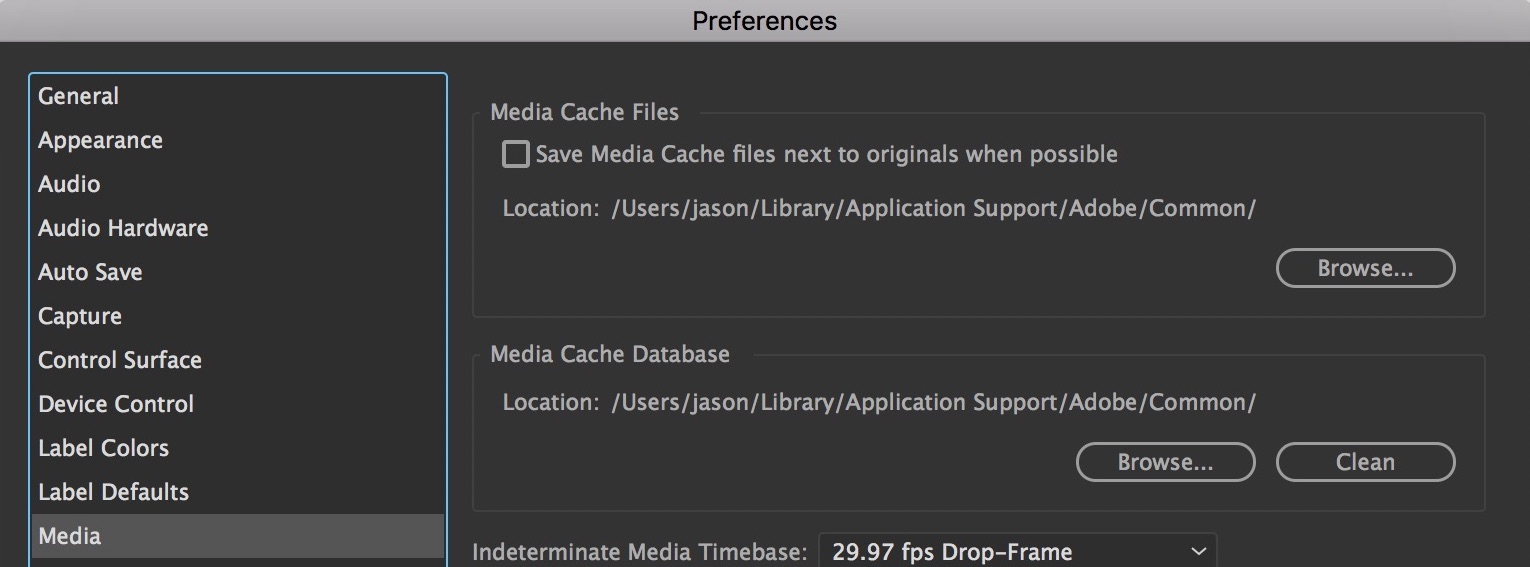
The Media Cache Files setting is for the directory storing the cache files (duh). The Media Cache Database is a separate directory maintaining a list and link to every file you’ve ever imported into Premiere. With the Browse button, you can change the directories to a custom location if you so wish (more on this later).
Where are these things?
The Preferences window lists the file path to these directories, but you might find them a bit challenging to navigate to yourself as they are typically stored within hidden folders. So where exactly is it? Look here:
Mac: /Users/yourusername/Library/Application Support/Adobe/Common
Windows: \Users\yourusername\AppData\Roaming\Adobe\Common
Both paths might require trickery to access. On the Mac, one easy way to access the typically hidden user Library folder is to go to the Go menu in Finder and hold down the Option key. On Windows, chose to reveal hidden items and folders in Explorer’s settings to reveal the AppData folder.
What the #$&! am I looking at?
Once at the Common folder, you’ll see a few important folders, depending on your version of Premiere: Media Cache, Media Cache Files, and Peak Files (CC 2017 and above). After working on just a couple of small projects, my Media Cache has eaten up 4 GB of drive space. Not huge, but, again, these were tiny projects.
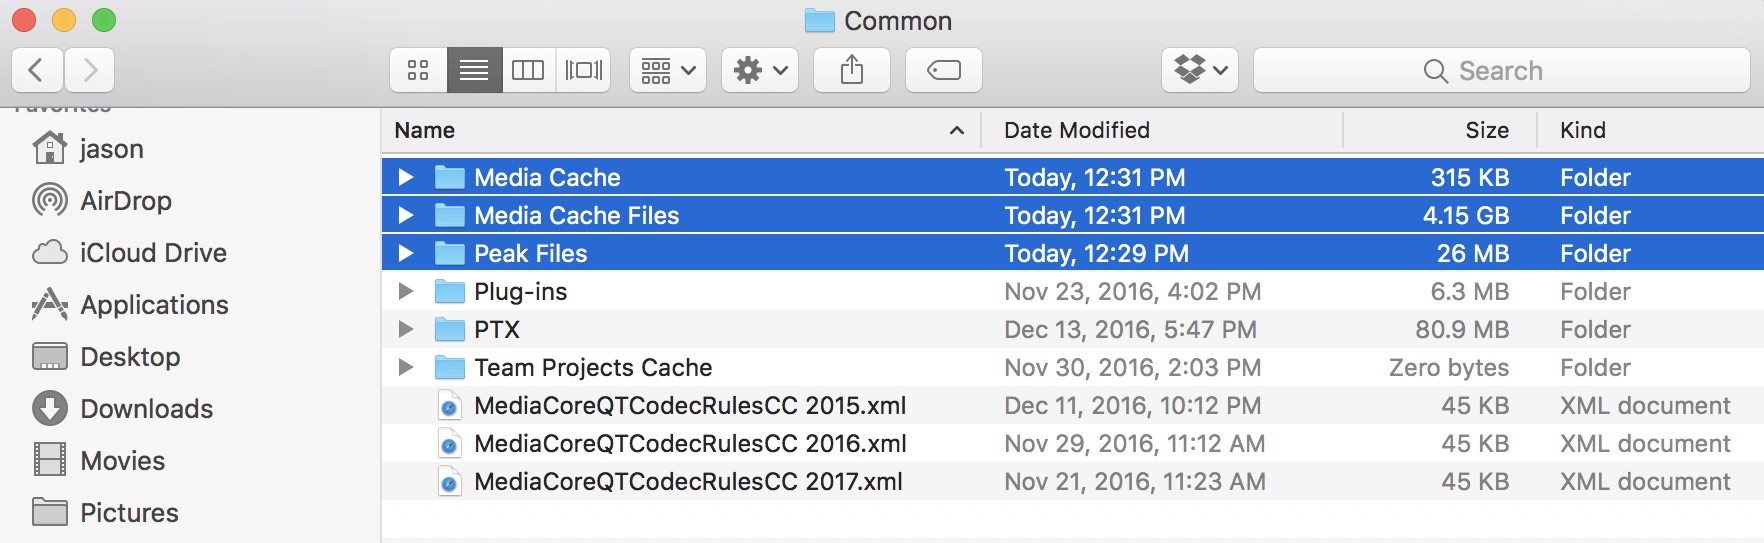
Inside each of these folders are potentially millions (only a mild exaggeration) of small and large files of mysterious purpose and often with indistinguishable names. In addition, there are multiple possible file extensions attached to these files.
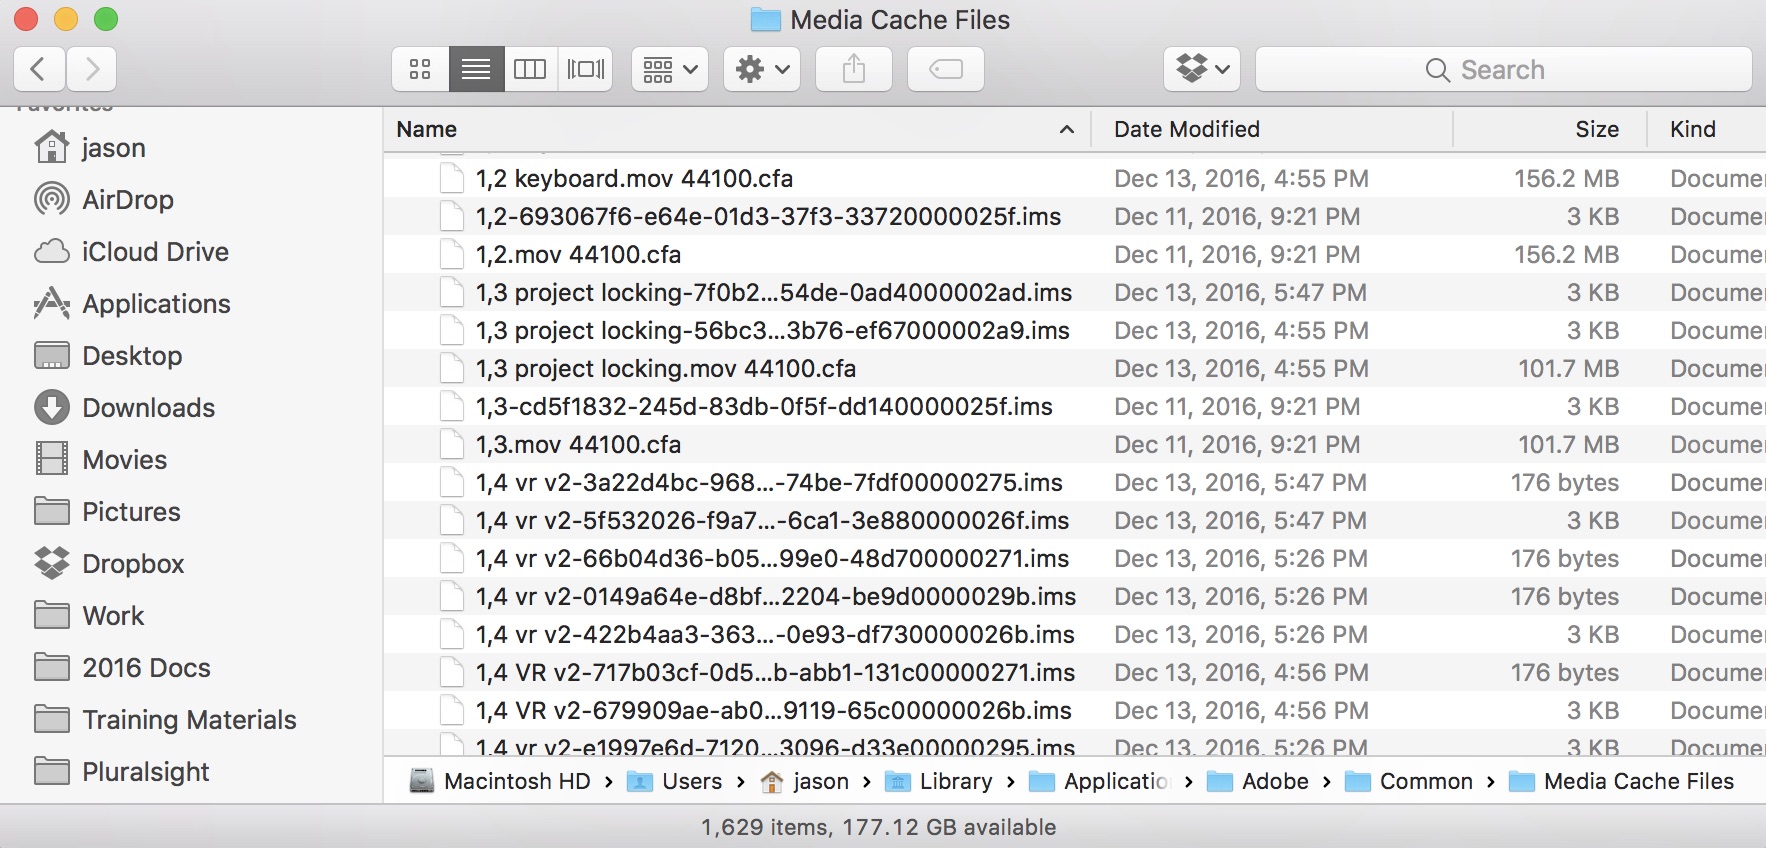
If you’ve ever wondered what all those bizarre extensions were all about, here’s a simple descriptor of each:
.mcdb - Found in the Media Cache folder, these crazily named, microscopic files are essentially links to every file you’ve ever imported into Premiere, regardless of a particular project. They help prevent Premiere from creating redundant cache files when you import a file into multiple projects.
.ims - This is a cache of file properties so that Premiere doesn't have to re-scan each media file every time a project file is opened. These files are also unique as they are system specific, which means that even if you change the location of the media cache to an external drive, .ims files continue to get created on your system volume.
.prmdc2 - These cache files are created per project file, not per media file, and are a metadata cache for the project file.
.cfa - These are audio conform files and are the biggest culprit in eating up hard drive space. Premiere creates these files for any compressed audio imported into Premiere. Think of them as secretly uncompressed versions of all your compressed audio, which Premiere can work with faster. If you pay close attention to the bottom right corner of your interface when importing a fresh file into Premiere, you can catch a brief sign of Premiere creating the conform file.

.pek - These files contain the actual visual representation of the audio waveforms you see in Premiere’s timeline and Source Monitor. They used to be stored in the Media Cache Files folder, but were given their own dedicated Peak Files folder in Premiere CC 2017.
.mpgindex - These index files tell Premiere where whole ‘I’ frames exist in some MPEG-based files which helps Premiere understand how to interpret the non-whole frames that exist in a temporally-compressed formats. If that made no sense to you (it’s a tough, technical topic), check out this Wikipedia article: https://en.wikipedia.org/wiki/Video_compression_picture_types
.mxfassoc - Some MXF files have media attached to them or multiple media streams and this is a file that keeps tabs on those media associations.
What does ‘Clean’ do?
Back in Premiere, one of the first things your eyes will lock onto in the Media Preferences is a ‘Clean” button. One might come to the reasonable conclusion that if you click this, it will purge your entire Media Cache, but you’d be wrong! Clicking Clean actually takes a few moments (depending on the size of your Media Cache) because it’s going through and looking for every file you’ve ever imported into Premiere (using those .mcdb files)! If it can still find the source media file, it keeps any associated cache files. If it can no longer find the file, it deletes them.
How do I REALLY purge the Media Cache? Should I? How often?
To truly dump the Media Cache, you have to do it the old-fashioned way - manually. First, quit Premiere. Then, in the Common folder, highlight Media Cache, Media Cache Files, and Peak files (if it’s there), and delete them. That’s it! When you relaunch a project file, Premiere will automatically regenerate the necessary cache files for the media in that project. The only drawback to this is that if you re-open a particularly large project (i.e. hundreds or thousands of clips), this could take a few minutes.
So, why should you? Well first off, extra hard drive space is nice! Especially if you’re purging files that you no longer need. It can also be a troubleshooting tactic for a few situations including if you ever run into the dreaded yellow ‘Media Pending’ message for a clip in the Source or Program Monitors or have clips not playing audio or displaying waveforms. As for how often, there’s no real recommendation here. When your hard drive is filling up? After wrapping a giant project? It’s up to you.
Can I use this to boost performance?
Merely deleting the Media Cache isn't likely to boost performance unless your hard drive was dangerously close to full. However, you can optimize Premiere’s performance a bit by using the Browse command (in the Media Preferences) to change the Media Cache locations. If you redirect the folders to a separate (ideally dedicated) fast drive, you may see a slight increase in performance. This may also be an ideal setup in collaborative environments (assuming very fast network storage) to prevent cache files needing to be generated on every user’s system. Keep in mind that this setting is not retroactive, so it will have to rebuild the cache files.
Bonus lesson: The Project Manager and Audio Conform Files
Additionally, Audio Conform files are referenced in the Project Manager as optional files to consolidate along with your media. Choosing to do so will prevent Premiere from having to re-create potentially tons of large conform files when you re-open the consolidated project another another system! Of course, the drawback is you’re consolidating a lot of extra media with your project that Premiere can always re-create if necessary. It’s up to you!
UPDATE: 2017.1 Media Cache Changes
There are two new things to know about the Media Cache after the Premiere Pro 2017.1 update, both of them quite important and useful!
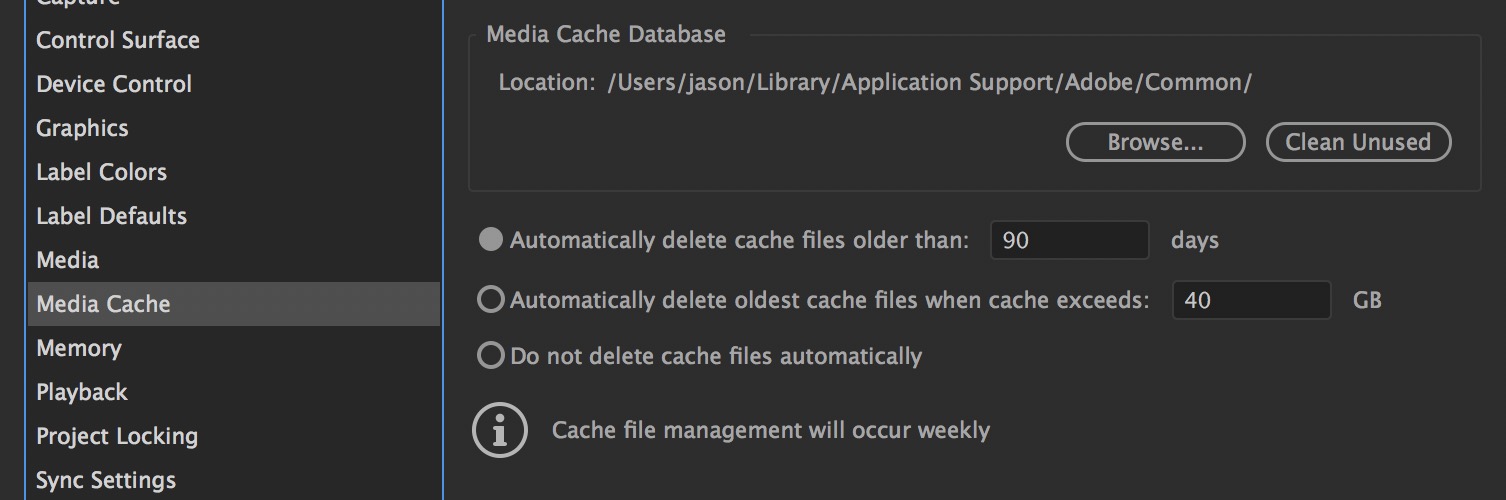
Media Cache Management Policies
You can now tell Premiere to auto-delete Media Cache files automatically by one of two simple rules: after a certain amount of time or after the cache reaches a certain size. The settings are found under the Media Cache settings in Premiere’s Preferences.
Cache Related Folder Additions
There are some new cache-related folder additions to the Common folder, including Essential Graphics, com.adobe.ae.aecap, com.adobe.ae.cap, and Team Projects Cache.
The first three are all related to the new motion graphic templates feature and Essential Graphics panel in Premiere and After Effects. If you have any issues with your motion graphic templates, you can purge the “com” folders and they will be re-generated upon the next launch of Premiere.
You can manage what motion graphic templates you see in Premiere by deleting ones you don't use in the Essential Graphics folder (don’t worry, they can be regenerated as well by deleting specific text files within the folder).
Lastly, Team Projects Cache can be purged if there appears to be media issues in a Team Project or if projects aren't updating properly. Otherwise, best to leave it alone!