Without a doubt, Premiere Pro is a world-class video editing application and it continues to improve with each passing update. It has top-tier features, which top-tier editors need to get almost any job done. That being said, no program is perfect and every program has its Achilles’ heel and Premiere is no exception. In my opinion, Premiere's weakness is titling.
One look at Premiere’s Title panel and we feel like we’ve stepped back into a 1997 version of Broderbund’s The Print Shop. Yes, it can do the bare necessities of static text with simple shapes (and even text on a path, woo!), but not a whole heck of a lot else.
Adobe’s answer? “Use After Effects!” Which is fine - assuming you know After Effects! There are a few plugins that can help for some basic animations (check out Coremelt’s free ActiveText plugin), but at the end of the day if you want your text to bounce, roll, spring, or sparkle in, or any other sort of flashy entrance, AE is the way to go.
This isn’t an article on how to create animated text in AE. That would take a short book (maybe a long one). What it does cover is a feature introduced in Premiere Pro CC 2014 that still seems to go overlooked: live text templates.
Premiere's been able to import AE compositions for years, but in 2014, Adobe added the ability to update AE comp text boxes directly within Premiere. This greatly cuts down the back and forth between applications and improves productivity. Think about making one animated lower third template in AE (or receiving one from a motion graphic artist) and then being able to duplicate and update the text dozens of time all from within Premiere. Let’s take a look:
The first step is either the easiest or the hardest, depending on your AE skill level: build a text animation. This can be a lower third, a built in animation, text on a path, whatever you like.
If you feel a little rough around the edges with AE and terms like text animators, keyframes, and masks as paths, let’s keep it simple. Despite having deep manual controls to make your text do almost anything your imagination can dream up, AE comes with a surprisingly large and decent collection of presets.
Open your Effects and Presets panel, open Animation Presets, and then Text. There are multiple styles of text animation presets that can be easily applied to a text layer. The Animate In category is the easiest to explore first.

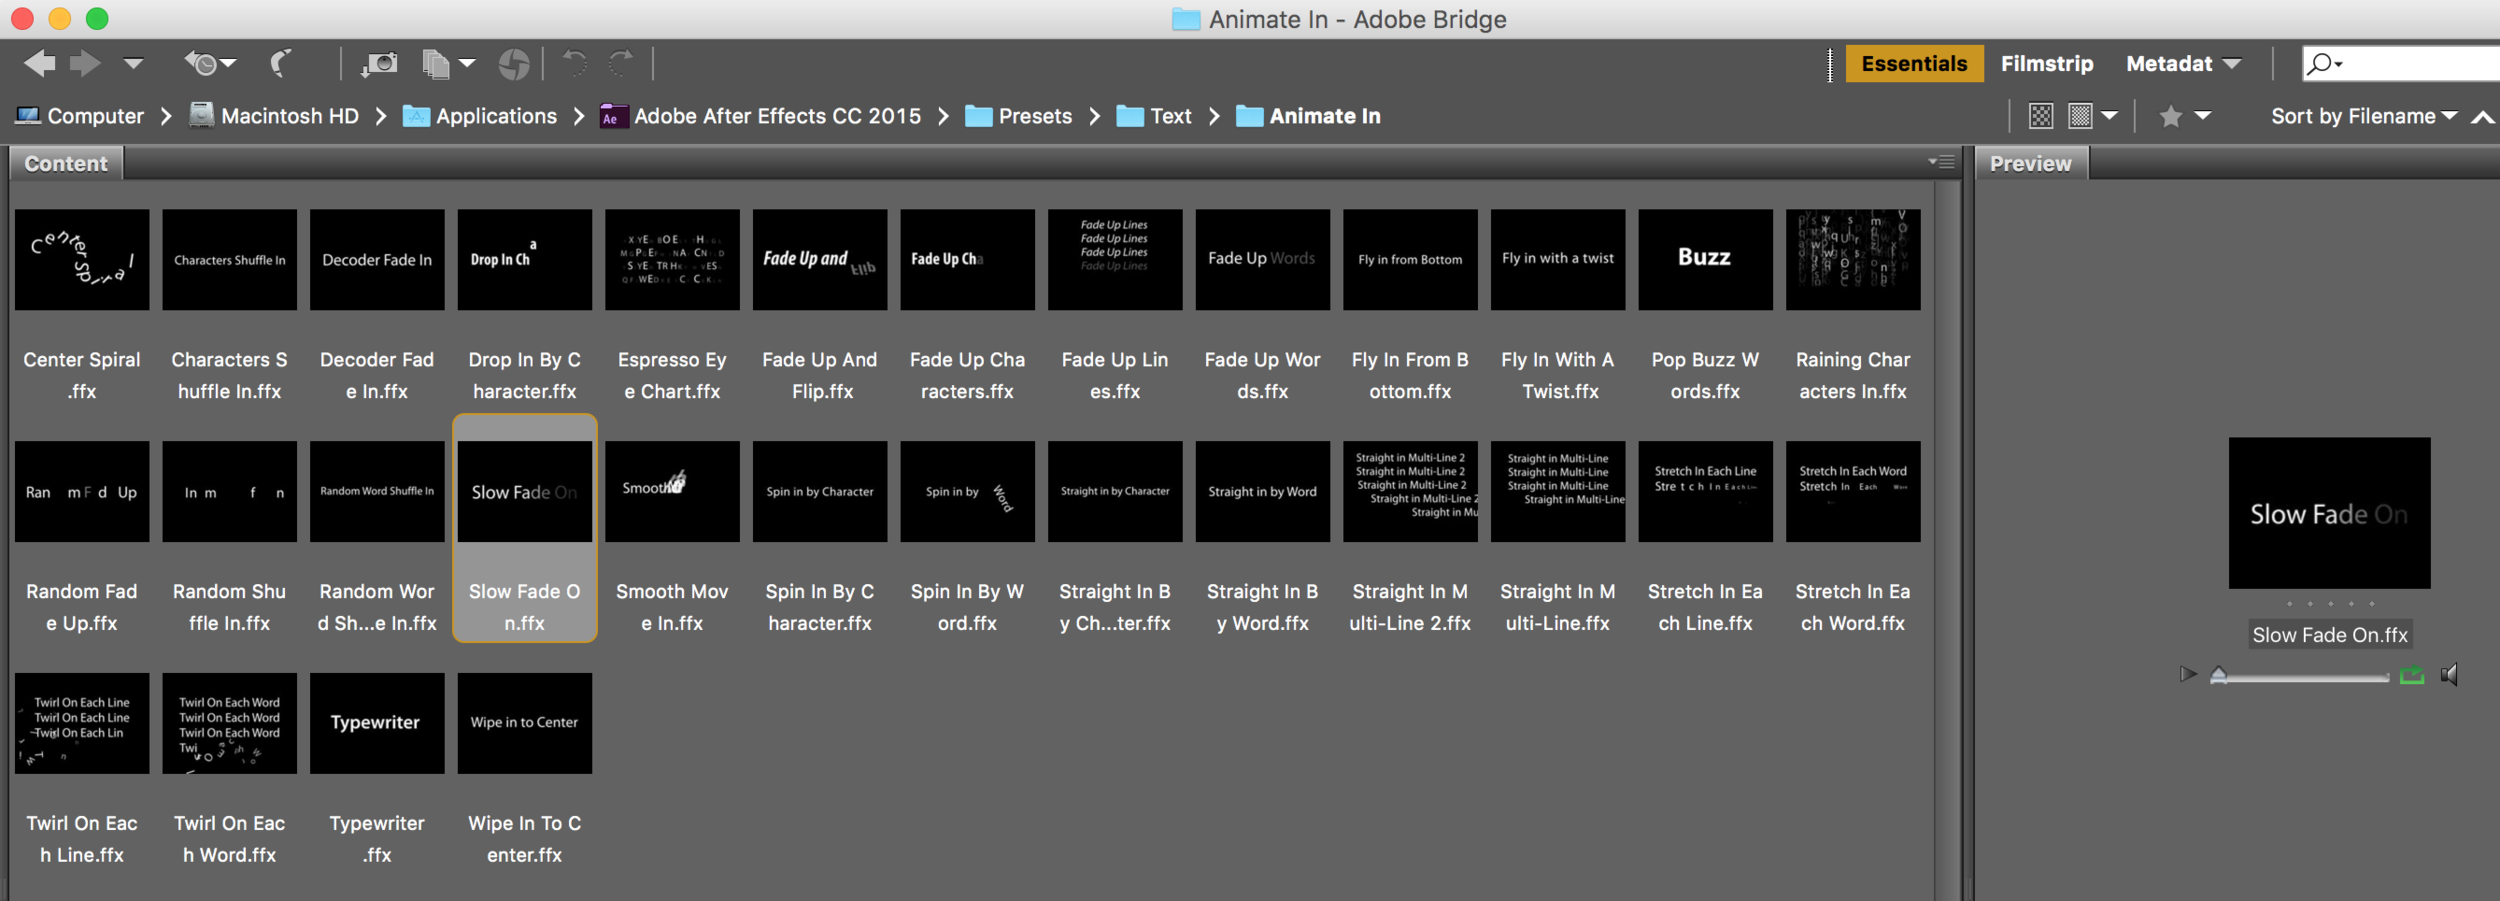
At first glance, it doesn't seem like there's a way to preview what a preset looks like in AE. But there is! It’s just a bit hidden. Go to the Animation menu and select Browse Presets and a surprising friend opens up - Adobe Bridge! Open any category of preset in Bridge and single click the still frames to load a tiny preview of what the preset looks like in motion.
When you find a preset you like it, flip back to AE and drag and drop it from the Effects and Presets panel onto your text layer of choice. Be careful of your playhead’s location as the animation will start where your playhead is, not at the beginning of the layer!
For bonus flair, you can of course animate any other elements, such as a logo you want to appear with your lower third. AE also offers many transition presets that work well with logos. You can check them out in the Animation Presets folder.
If you’re struggling a little bit, feel free to download a very simple lower third project file to play with.
Now that you have your animated text, this is historically where we would go back to Premiere and import the comp. But if we did, we would not have the ability to edit the text. There’s an easy to miss step here. Simply open up your Composition Settings window (Command+K on a Mac, Control+K on Windows) and select the Advanced tab and check the box marked Template.

At this point you can leave AE. You need to at least hit Save, but you don’t have to close the project file (although, I have seen occasional quirky behavior when running an AE project file also imported into Premiere at the same time). Either way, return to your Premiere project and import the AE project file. Premiere will display a list of any compositions that have been marked as a template from said project file. Select your primary composition (it’s ok if you had precomps, you only need the primary one) and it will appear in your Project panel with a Dynamic Link icon. Premiere treats it just like any video file, with one cool exception - you can edit the text!
The next few steps can be done in multiple different orders, but I’ll show the one I think takes the fewest clicks.
Select the Dynamic Link clip and duplicate it as many times as you might need it. The most obvious situation being for a reusable lower third.
RENAME THEM APPROPRIATELY IN THE PROJECT PANEL. This is in all caps because nothing upsets me more than seeing clips named “my cool lower third,” “my cool lower third Copy 01,” etc. Perhaps something like “LT - Jason,” “LT - Chris,” etc.
Here’s the magic moment. One at a time, double click the dynamic link clips to load them into the Source Monitor and go directly to the Effect Controls panel. If all goes well, you should see editable text boxes reflecting your text layers from AE!

Adjust text as necessary.
Drag and drop into your sequence as necessary.
That’s it! Now for the caveats:
If you drag and drop the dynamic link clip into a sequence first, you’re still ok! Simply double click the clip, go to Effect Controls and select the Master Clip settings to find the editable text boxes.
If you want to change anything else about your text or the composition as a whole, even if it’s just the font or color, you have a bit of work to do. Right click any instance of your Dynamic Link clip in your sequence and select Edit Original (DO NOT CLICK Replace with After Effects Composition!). The original project file will open. You can edit the composition to your heart’s content, hit Save and immediately return to Premiere to see the updated results across all uses of that template.
Next obvious thought - “But what if I only want to alter properties for SOME of my titles?” Perhaps you want half your lower thirds to have blue banners behind them and some to have green banners. It happens. Well, you’ve got a bit more work to do. You must return to AE again and duplicate the composition in AE, make your desired change to the duplicate, give it an appropriate name, head back to Premiere, import it as a second composition, and finally replace and update the Dynamic Link clips currently in your timeline. It sounds like a lot, but once you get used to the workflow, it’s surprisingly quick. Most of the time.
As you can see, the more foresight you have ahead of time, the less work you will create for yourself.